Recently I put together some quick photography tips for a friend. Years ago she had purchased a nice DSLR camera which was collecting dust. She wanted to put it to use during her upcoming summer vacation. I jotted down these quick tips to help her get started.
Equipment basics:
1. Flash - There are some instances where a flash is useful but in most outdoor, daytime situations, it creates ugly shadows. My suggestion is to turn it off to take pictures during your summer travels where you are likely to be spending time outdoors.
2. ISO - Leave it on "AUTO".
Camera settings for shutter speed and aperture - the only 2 modes that you would need to get started.
3. Shutter speed - When taking pictures of moving objects e.g., kids running around, moving bus or train or a waterfall, set the camera in the "shutter priority mode" and use a high shutter speed. In a Nikon camera, it is the "S" mode. In a canon, it is usually the "Tv" mode. Refer to your camera manual to know what it is called.
Do not use this mode for taking pictures of still objects or scenery.
4. Aperture - Almost always use the "Aperture priority" mode. "A" mode in Nikon/the "Av" mode in a canon.
Use only the above 2 modes, "Aperture priority" 90% of the time and "shutter priority" to capture moving objects. Do not use full "auto" or full "manual". Full auto doesn't give you the best results. Full manual is too time consuming hence not suitable for everyday/travel photography.
Lens settings for achieving the right depth of field (aperture and focal length)
Before we get into the lens settings, I would like to touch on what is know as the depth of field (DoF).
A shallow depth of field gives you the "bokeh" effect where objects in the background are blurred. This is useful to get close-up photos, shoot people's face etc...basically to isolate an object. Here is an example:
To achieve shallow depth of field you need,
 |
| Shallow DoF |
To achieve shallow depth of field you need,
a. Maximum possible aperture (which is the lowest possible f/stop number).
b. High focal length - For shallow depth of field go as high as possible on the focal length. say 100mm. If your camera has a crop sensor, multiply the focal length on the lens with a factor of 1.5 or 1.6 (1.5 for Nikon & 1.6 for Canon). i.e., 100mm focal length would now be equivalent to 150/160mm.
In essence, high aperture + high focal length => shallow DoF
A deeper depth of field is great when you want to capture the details of the background. when you want to capture the beautiful scenery not just the main subject. With this you can create images of a grand landscape. Below is an image with deeper DoF.
 |
| Deeper DoF |
To achieve deeper DoF, you need:
a. low aperture (high f/ number)
b. low focal length. Typically 35mm is a good focal length. The lower you go, the wider the angle.
If your camera has a crop sensor, use a factor of 1.5 or 1.6 as the case maybe. You could go as low as 18mm (equivalent to 28mm).
Other things to keep in mind:
Clean the lens with a soft cloth now and then. I use the wipe we have for our regular eyeglasses. You can breathe into the lens and then wipe it off with a clean, soft cloth.
Lighting tips
1. Overcast is way better than very sunny. Harsh sunlight makes it really difficult. Typically hours closer to sunrise and sunset are the best times of the day to take nice pictures.
2. Open shade provides the best lighting.
 |
| Open shade |
3. Window light - This is also very good. Light coming in from the windows. Position objects close to the window or perpendicular or even right across from the window.
Composition tips
1. Use simple backgrounds with texture. I love tree barks & brick walls. Here is an example from one of my recent sessions..
 |
| Simple textured background |
3. It is a good idea to take landscape photos rather than portrait. Usually gives you some room to crop the image.
4. The famous rule of 3rds: Divide the frame into a 3x3 grid and try to position the main subject in one of those 4 intersections (red circles as shown below)
 |
| Rule of Thirds |
5. Avoid objects jutting out of people's heads...say a tree or a lamp post sticking out of the head.
6. Leading lines - Use any lines in the background to create symmetry and definition.The basic idea is to make sure the lines are placed in a symmetrical way and are leading to a point of convergence. See the example below.
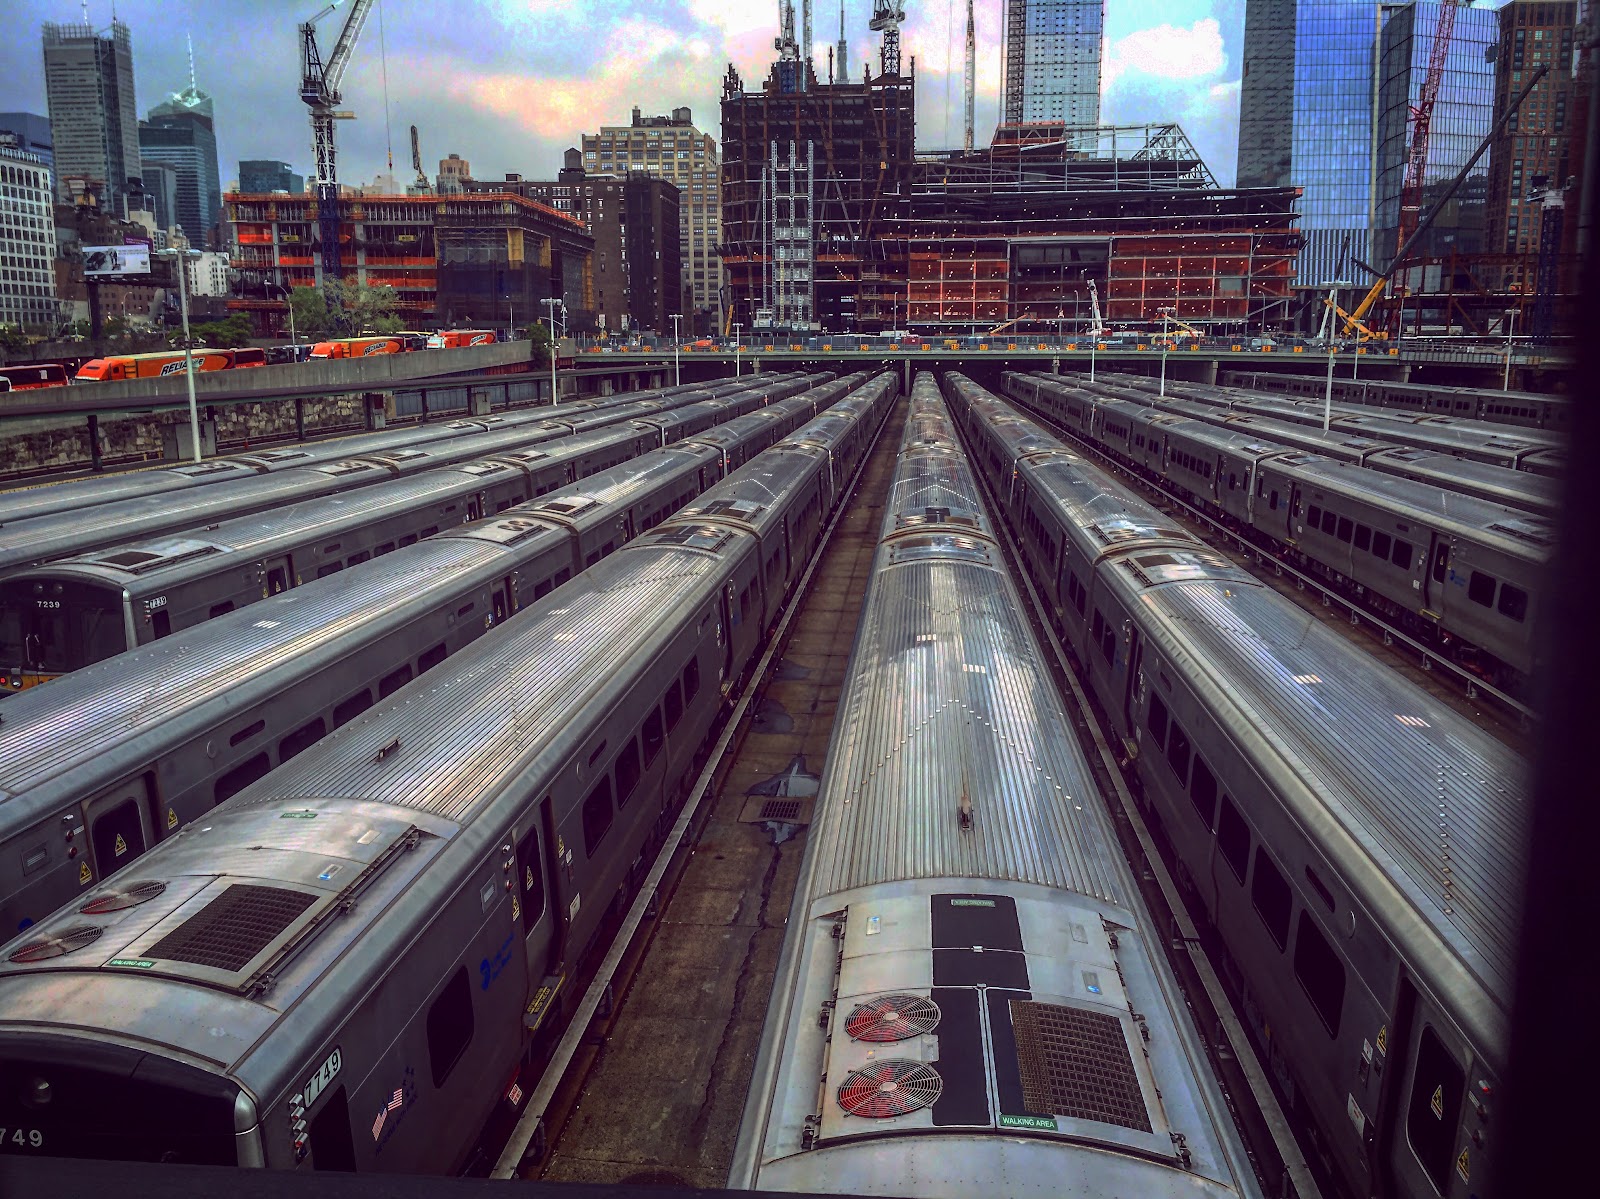 |
| Hudson Yards |
Hope you find all of this easy and helpful. Happy travels!
No comments:
Post a Comment